
Wondering how to tie off threads so a seam does not unravel? Most of the time, a backstitch is the right answer: a few stitches forward and a few reverse at the start and end of the seam. It is quick, secure, and what most sewists use for everyday construction.
Backstitching is not always ideal, though. Delicate fabrics can get chewed or puckered under reverse stitching. On lightweight cloth, the reverse stitches can also add a little bulk that shows through. Visible stitching, such as many topstitching lines, often looks cleaner without that denser reverse section. There are exceptions, such as high-stress topstitching on a jacket, where the extra security still matters. Older machines without a reverse lever or button are another reason to use a different method.
One alternative is to shorten the stitch length at the beginning and end of the seam instead of reversing. Reducing the length to about 1 mm or less creates a tight cluster of stitches that resists unraveling without the bulk of a backstitch. This works especially well on very lightweight fabric, where reverse stitching can leave a mark or add stiffness.
If you are sewing a seam or topstitching and want a clean finish, start with that short stitch for the first short stretch, sew the main seam at your normal length, then shorten again at the end. For an even more secure, low-bulk finish, use the knotting method below.
3 Simple steps To Tie Off Threads with a Knot
This technique finishes a seam without backstitching at either end. It takes a little longer than reverse stitching, but it gives a neat, secure result when appearance matters or the fabric is fragile.
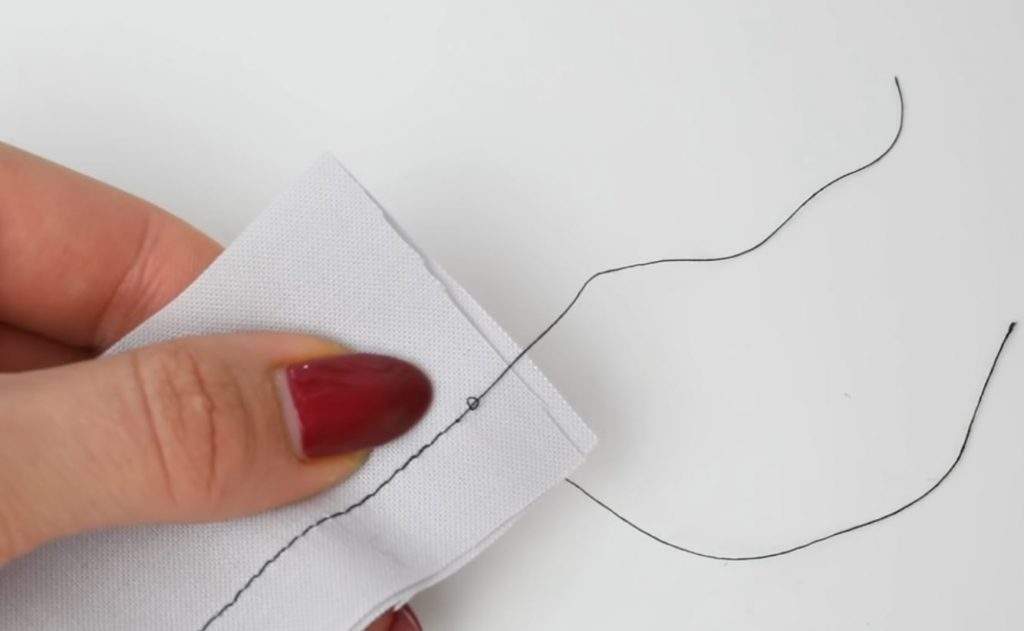
1. Leave a long tail at the end of your seam
Sew to the end of the seam, stop, and lift the presser foot. Pull the fabric away gently and leave long thread tails, about three inches (roughly 7 cm). Short tails make knotting awkward and more likely to slip.
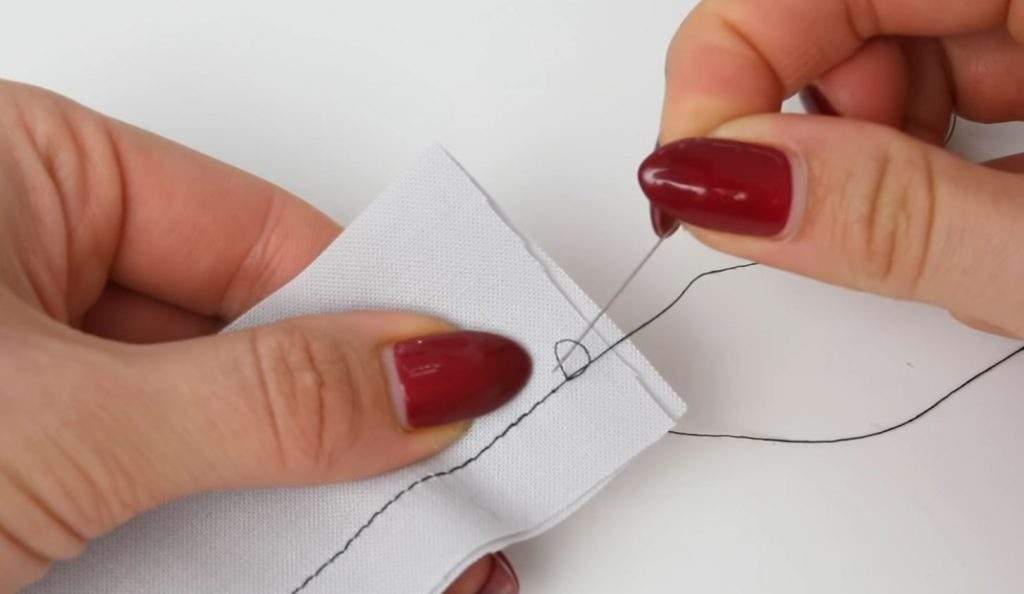
2. Take one of threads and pull it out to the opposite side
Gently tug the upper thread so a small loop appears on the fabric surface. Use a pin or hand needle to catch that loop and pull the thread through to the other side of the fabric. For topstitching, pull both threads to the wrong side so the knot stays hidden. For a regular seam that will be pressed open or enclosed, either side is usually fine as long as both threads end up together.
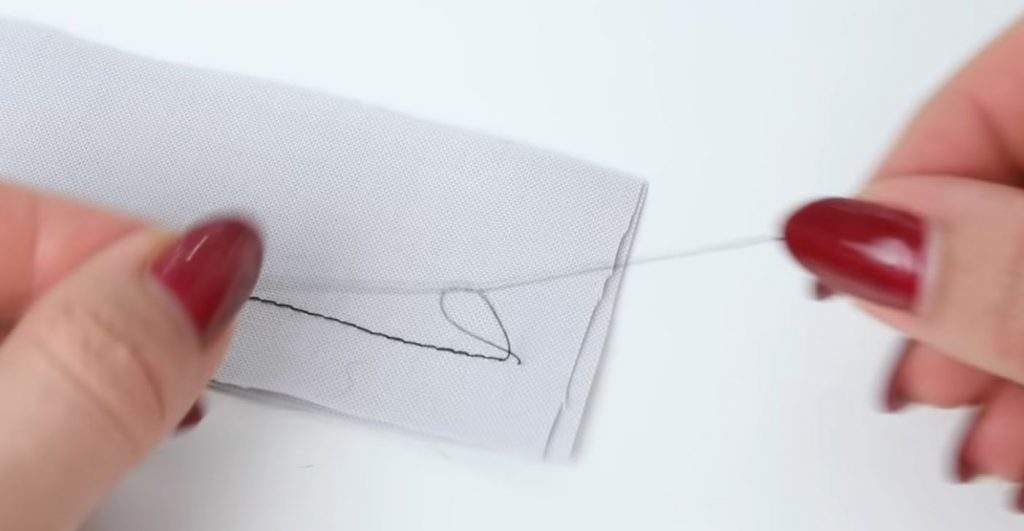
3. Finish by knotting the threads
With both threads on the same side, tie a firm knot close to the fabric. Separate the strands if needed, then knot again through the loop so the finish does not slip. Trim close to the knot once it feels secure. Do not yank hard enough to gather the fabric; snug is enough.
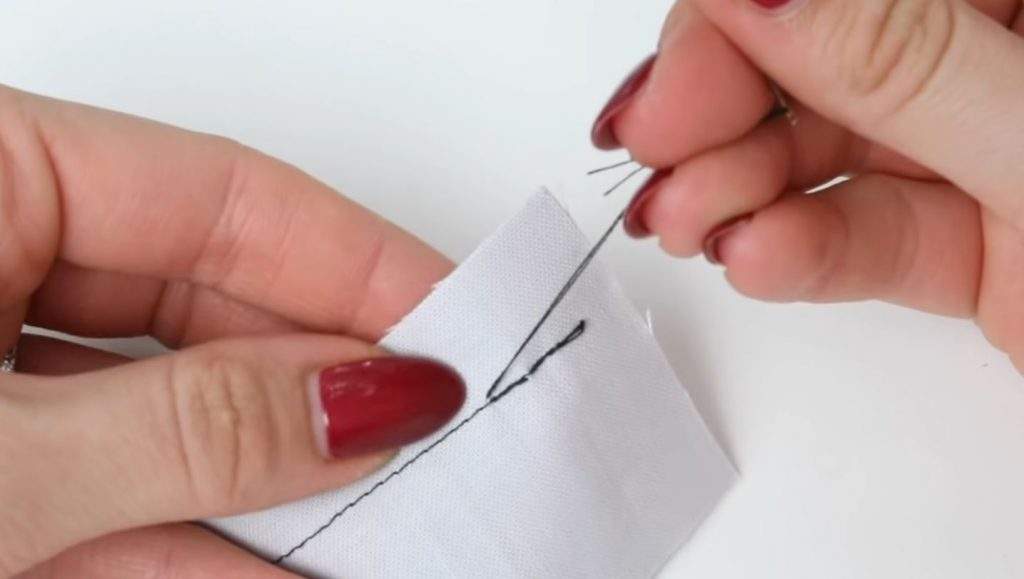
4. Sew up and down your seam
For extra security on a seam that will take stress, leave about 3/8 inch (roughly 1 cm) of thread after the knot instead of trimming flush. Thread both tails onto a hand needle and weave them back through the stitching for a short distance. When the ends feel locked in place, trim the remainder. This takes more time than a backstitch, but it is a good tradeoff when reverse stitching would show or damage the fabric.
Remember the limitation: knotting and short stitches are excellent for delicate fabrics and visible stitching, but backstitching is usually faster and strong enough for most construction seams. Use the method that matches the fabric, the stress on the seam, and how visible the finish will be.