Wondering how to tie off your threads and knot them to keep them from unravelling? The majority of the time, you’ll want to do a back stitch, which is a couple of stitches forward and a couple of stitches back at the beginning and end of each row of stitching. That will give you a nice secure seam, and it’s what most sewists usually do because it’s quick and easy. However, there may be times when the backstitch is a bad choice, and you may also have an older sewing machine that does not have a back stitch button. If so, you can also use these methods. If you are a beginner wanting to learn how to securing your stitching at the beginning and end of a seam, this could be very helpful.
This method is simple but very effective on certain projects and with specific fabric types. For instance with fabrics that are so delicate that back stitching would eat them up. A backstitch would could also look sloppy since backstitching adds a little bulk at the end of the seam, especially noticeable with lightweight fabric. Other times where you don’t want to use backstitching is when the stitching is visible, such as with topstitching. Unless it is something really secure, like top stitching around a jacket. Instead use the method outlined below for a more more professional finish.
Instead of tying off your threads, you can shorten the stitch lengths at the beginning and end of your seam. You can prevent very small stitches from coming undone by shortening the stitch to less than one millimetre in length. This is another method, and it’s one I like to use when working with very lightweight fabric, where back stitching would add bulk or might chew up the fabric.
If you’re sewing a seam or doing some top stitching, you can reduce the size of your stitch to one millimetre or less at the beginning to help prevent it from coming undone.
3 Simple steps To Tie Off Threads with a Knot
Below is a very simple technique on how to finish of a seam without backstitching at the beginning or end of your seam. If you don’t want to backstitch, tie up your threads this way for a secure finish.
1. Leave a long tail at the end of your seam
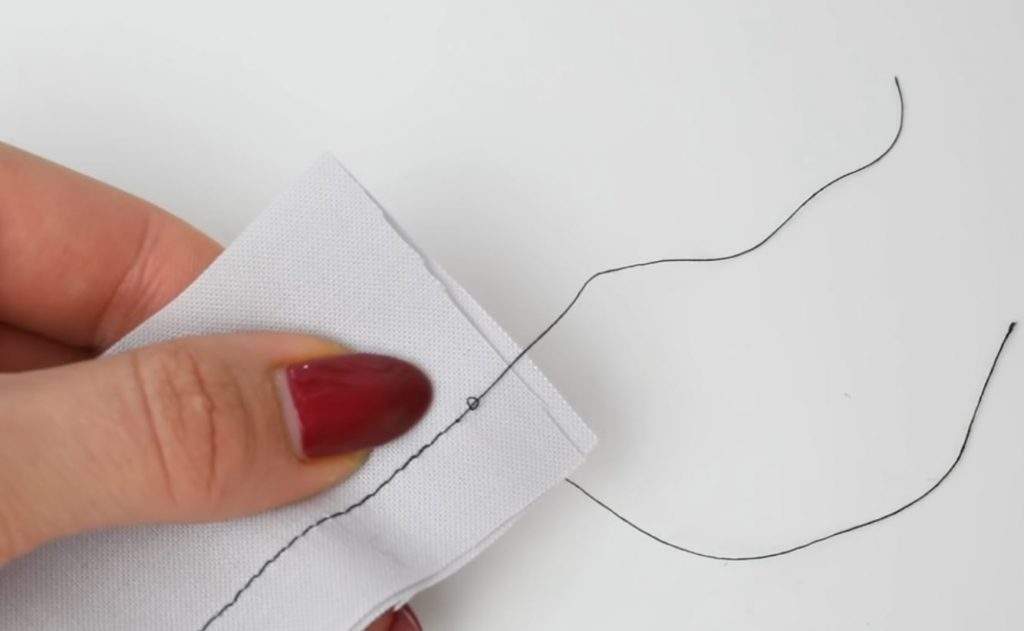
Stop sewing when you reach the end and lift up the foot to bring out the fabric, remembering to leave some long tails of the thread, about three inches or seven centimetres.
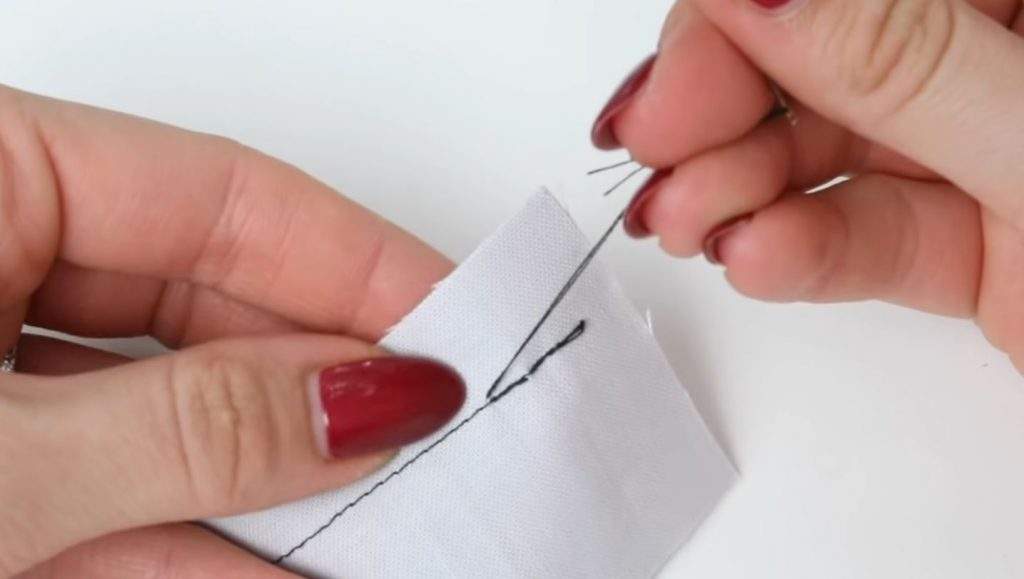
2. Take one of threads and pull it out to the opposite side
When you give the thread up pull a little loop will appear, with a needle or a pin, take one of the threads and pull it on the opposite side of your fabric. If you’re topstitching and have a wrong and right side, you’ll want to do this on the wrong side. If sewing a seam, tt wouldn’t matter which side you pull the threads to.
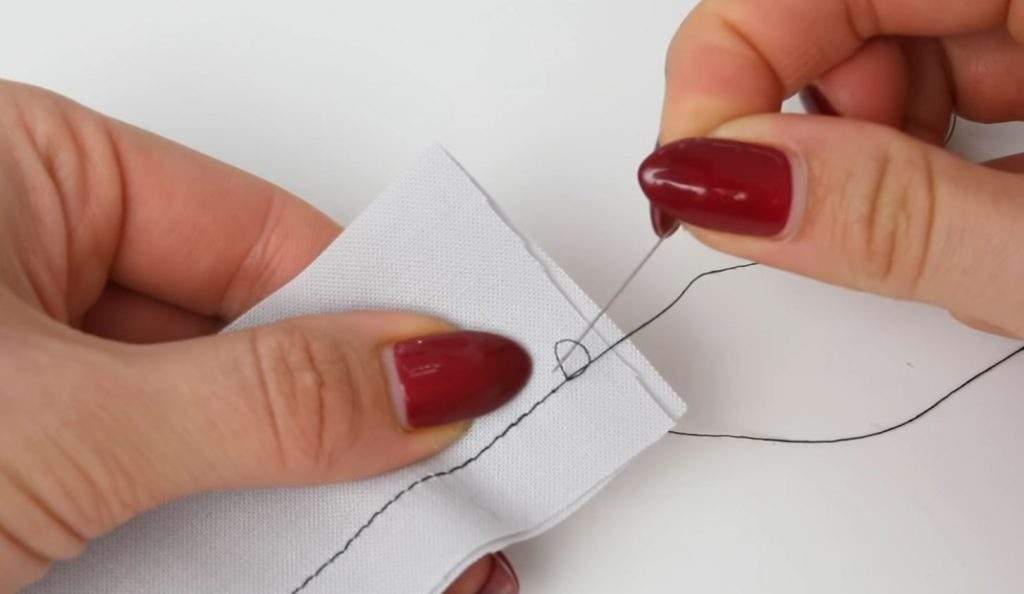
3. Finish by knotting the threads
Then you’ll simply knot the threads, separate them, and then knot once and twice through the loop. This should hopefully be secure enough for what you’re working on. Finish by cutting close to the knot that you’ve tied
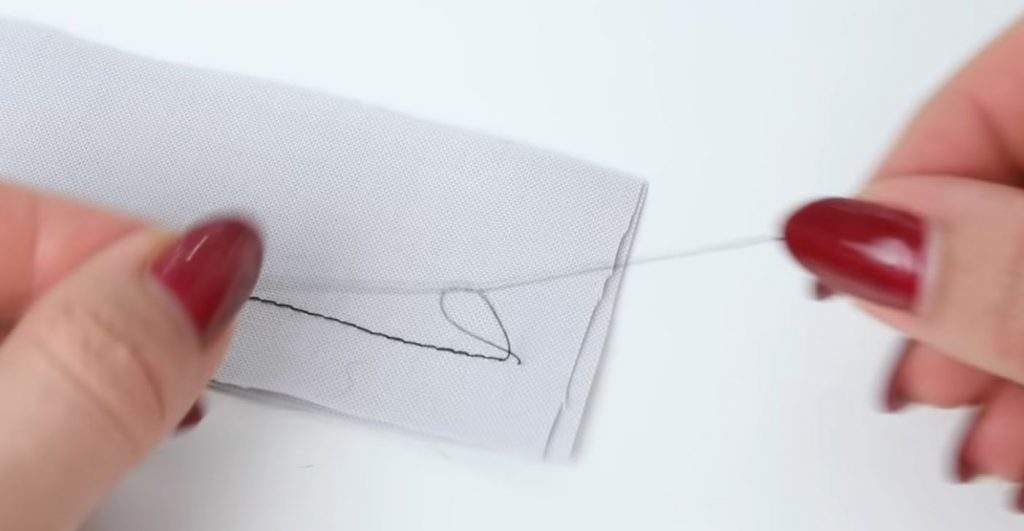
4. Sew up and down your seam
For an extra secure finish, you can instead of cutting the thread close to the knot, leave a centimetre or three-eighths of thread. Strap the two threads through a needle and then take the needle and thread up and down your stitching. Once you’re satisfied that it’s nice and secure, cut the remaining threads.